-
Open the Web Service Setup page on the Server and the Client.
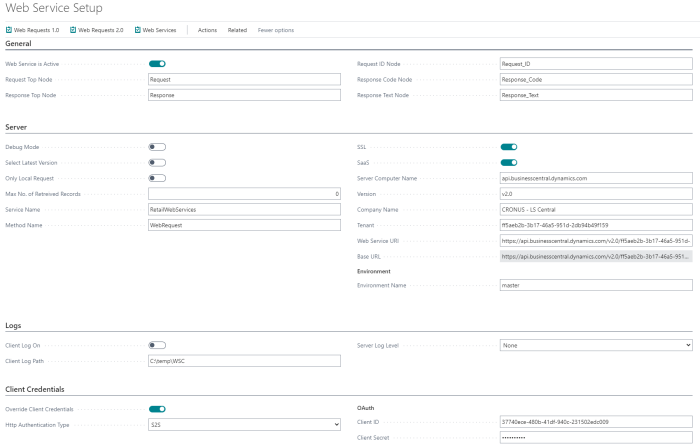
- Enable SSL, if the server URL is https.
- Enable SaaS because the server is running on SaaS.
- Fill in all fields as in the above image.
- In the Client Credentials FastTab, enable Override Client Credentials and change Http Authentication Type to S2S.
- In the Client ID field, enter the App ID that you created on the Azure portal (see How to: Set Up an Azure Active Directory App).
- Go to the Web Requests 2.0 page, and click the Publisher action on the server and the Subscriber action on the client.
- Go to the POS Functionality Profile List, and select the profile you want to change (for example ##DEFAULT).
- On the profile card, click the Related action and then Web Servers.
- Clear the Local Request check box, and select the distribution location.
- Back on the profile card, in the Web Services FastTab, select the Distribution Location in the Send Transactions section.
- Open the Distribution Location Card, for example for HO.
- In the Web Server FastTab, add the same information as in the web service setup.
The POS will now send requests to the Server on SaaS, and will authenticate using OAuth 2.0.