The Table List Panel without Data Grid and Hospitality Types.
The following examples give you an idea of how it is to work with a dining table list on a POS terminal.
The Table List Startup POS
- Go to the Retail Users page.
- Select store S0005 and POS terminal P0047 for the current user.
- Click the
 icon, enter Run POS, and select the relevant link.
 - Click Logon, and log on with Staff 501.
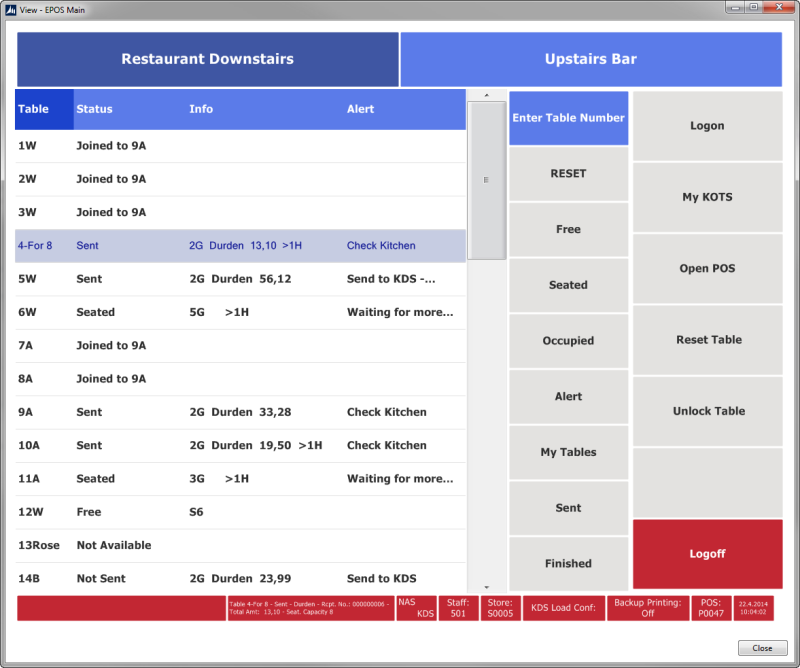
This is an example of a Table List panel. It has been set up in this way:
-
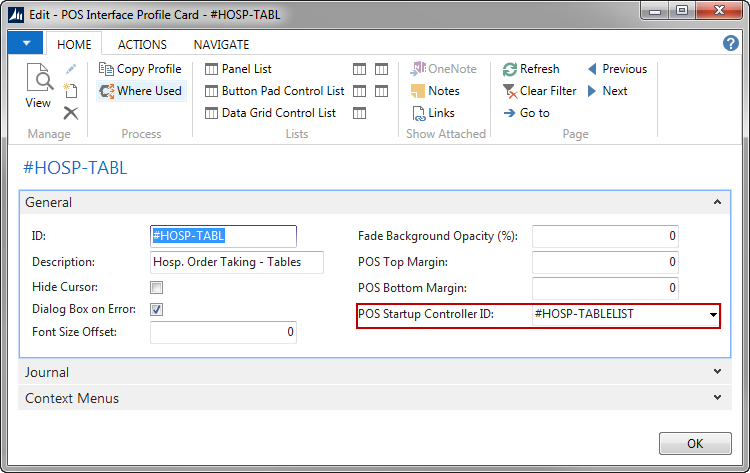
It is run from POS terminal P0047. This POS terminal has interface profile #HOSP-TABL. This interface profile has as POS Startup controller, #HOSP-TABLELIST:
- The top menu switches between two hospitality types (the POS terminal‘s Sales Filter specifies which ones).
- The list shows the table description, status, table information and alert.
- The grid menu contains a button for entering the table number and the rest of the buttons filter on the dining table status, alert, staff and Kitchen Status.
- It is possible to add buttons to filter Kitchen Status Not Sent and Started to the grid menu. Simply add buttons with POS Command HOSP-TABLELIST-FUNC and parameters NOTSEND and STARTED.
- The function menu contains the logon, logoff commands and the My Kots command.
- The status bar at the bottom shows a message, more table information, information on services, and other information.
Note: You can simplify the panel even more by removing the grid with the list and the top menu (the POS is then only looking at one hospitality type. Then all you have is the menu with a button to enter the table number and the function menu plus the statusbar at the bottom.
Taking an order
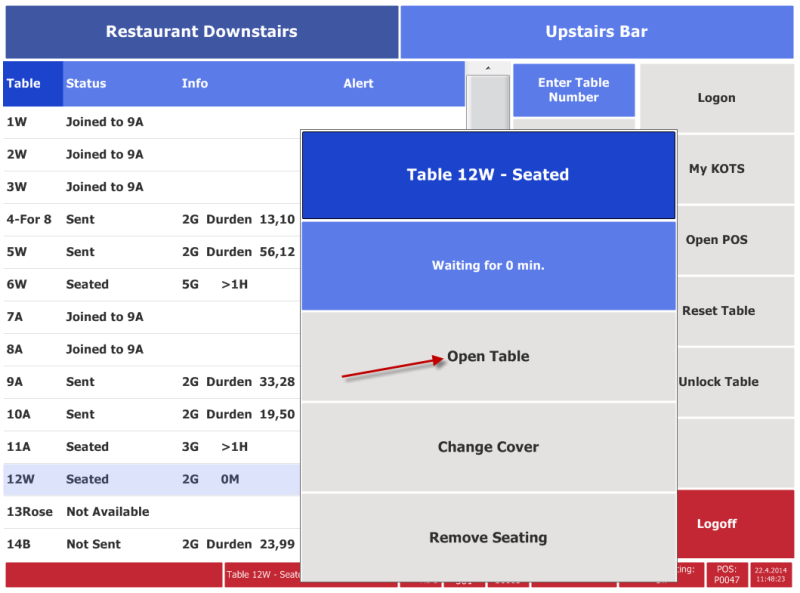
To take an order for table that has been seated, click on the table. The Pop-up menu shows the possibilities. Select Open Table to take an order or press the blue area to close the Pop-up menu. You can also open the table directly by entering the number.
The Table List Panel without Data Grid and Hospitality Types.
Minor changes can be done to skip Data Grid and Hospitality Types. Then the only input is to Enter Table Number. The Panel will look like this:
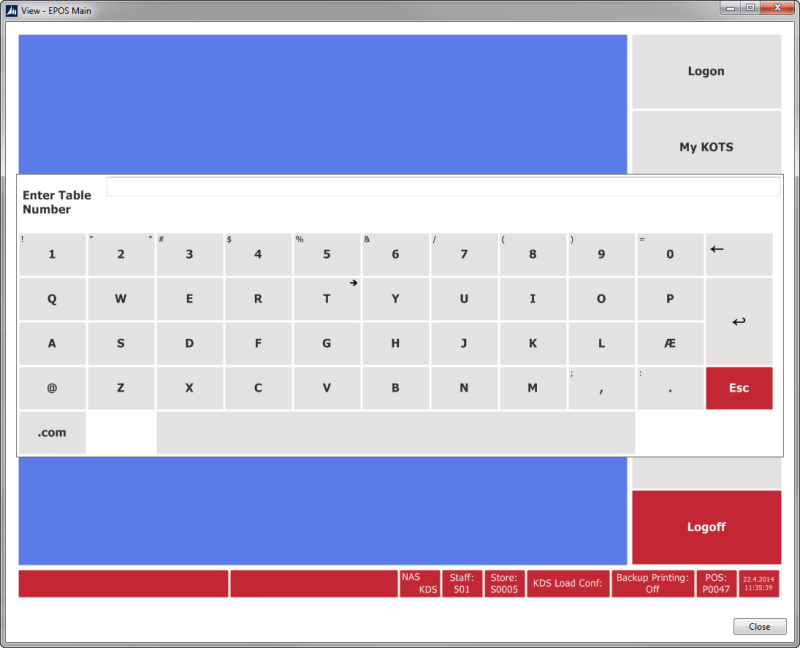
The changes to be made are:
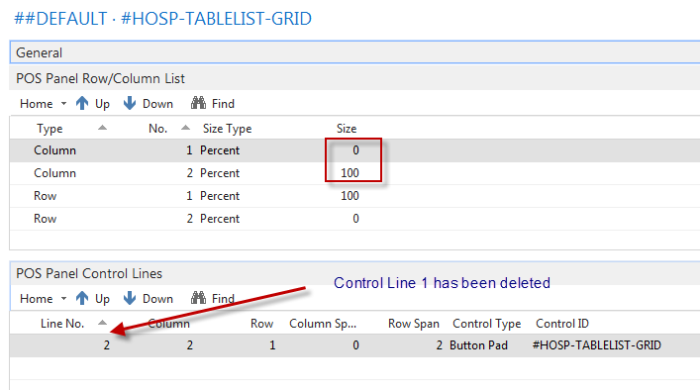
- Panel #HOSP-TABLELIST-GRID in Interface Profile ##DEFAULT: Delete Control Line 1 and set Column 1 Percent = 0 and Column 2 Percent = 100.
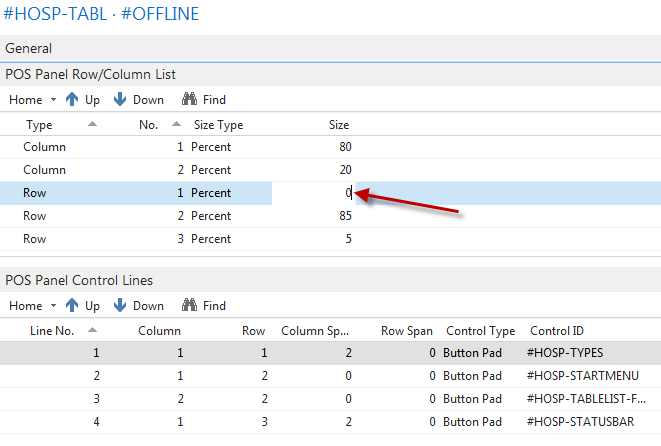
- Panel #OFFLINE in Interface Profile #HOSP-TABL: Set Row 1 Percent = 0.
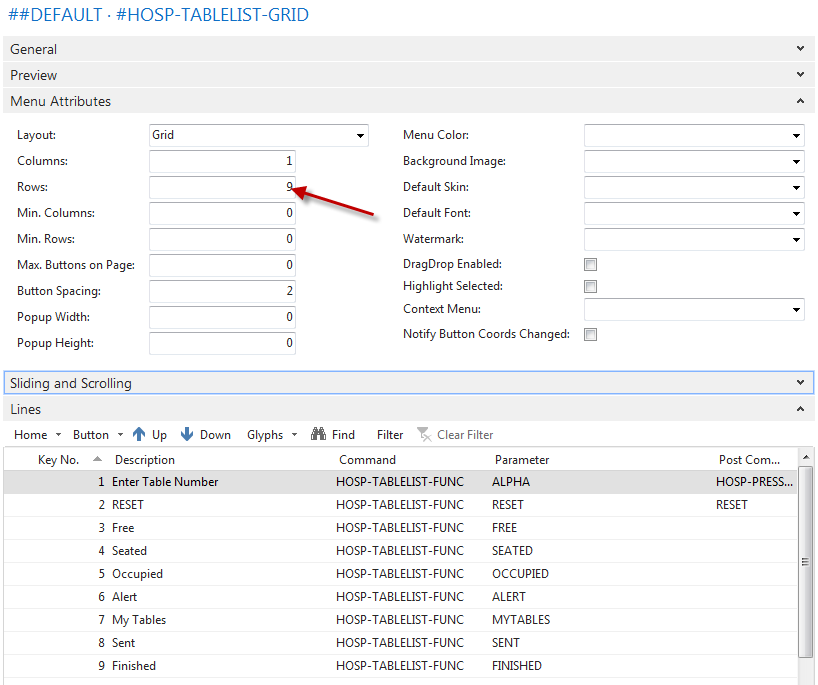
- Menu #HOSP-TABLELIST-GRID in HOSP-TAB: Set Rows = 1.
To get numeric Keyboard instead of alphanumeric, change the Parameter in HOSP-TABLELIST FUNC command from ALPHA to NUMBER.